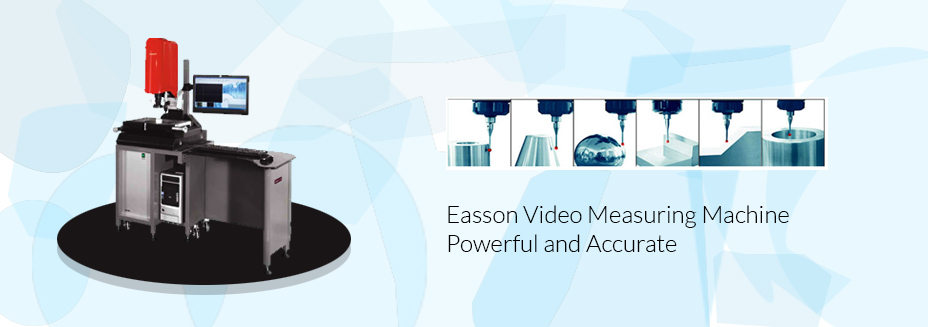
TECH VIDEO SCOPE can effectively test profile, surface shape, angle and location of various complex work pieces, especially in microscopic test and quality control of precision part. It is widely used in electronics, measuring instrument, cutter, precision machine element, precision hardware, electronic component, rubber and finished rubber product, semiconductor component, the punching piece, mould producing, cars, machine manufacturing, military industry, space industry, universities, institutions etc., and in different measuring departments and inspecting in factories.
Comparable software is equipped for different type of our product and dates can be easily transferred into EXCEL/WORD or AUTOCAD in computer. It is useful for its easy understanding, easy learning, high accuracy, conveniently operating and can be modulated at discretion when scanning the border.
The characteristics:
- Stability for its base is made of granite.
- Transmission and refection illuminating lamps use LED with high intensity, long life, and small volume. Light from bottom and surface can be modulated.
- Worktable provide with big measuring range, with high precision accuracy and effectively operating…
- Suitable for different work piece for its rapidly changing magnification of its image by a continuous change of its objective.
- High efficiency for its gapless attrition transmission and its worktable quickly movement.
- A special table for computer and the instrument.
- Use CCD to procedure the image replacing the objective of microscope.
- JVC, equipped OVM software , use only mouse can realize the whole measuring function for its XYZ-axis, objective, lights are controlled by the computer.
- JVP, equipped OVM+TPM software, added Touch Probe ,can measure surface, circle, groove, chimb pole, sphere ,wimble, finestra, height of work piece.
1) JVE, including the above function, equipped 2Dvision measuring instrument with OVMLITE belongs to the economic type.
2) JVP, including the above function, equipped 3Dvision measuring instrument with OVM .Its z-axis switch and the board for adjusting light are prefixed and the digital display is connected directly to the product and the objective magnifies automatically.
OVM / OVM Lite (software for image measuring)
A. Main function: enactment of reference frame, displaying of measured value, measurement by the light from bottom and surface, profile mapping by two dimensions, enactment of distance and the image can be transferred in to AUTOCAD when working.
B. Measuring function:
- Collection: point, line, circle, arc and angle.
- Combination: measurement among the combination of point, line, circle, arc and angle; measurement of the distance between the
- centre of two circles, tangent of two circles, line between two lines with the same distance, centre point, vertical distance, graphics, crossing point of two lines.
- Tolerance: coaxially, circularity, calculating linearity, position and gradient.
- Newly added function of OVM: intelligent operation, auto border search with a cross-coordinate conversion and etc.
- Advanced function of OVM: SPC, 4-dimension auto LED switchable light source, measurement of the height, auto/handed procedure.
C. Other function: Compared the work piece with the original drawing by using DXF to inspect warp.
TPM (additional software for JVT series only):
- Main function: Touch probe correction, dimension adjust, general geometry element measuring
- Include: point, line, circle, plane ,sphere, cylinder, taper, Distance, angle and more function choices
- The part of geometry and shape tolerance include: straightness, roundness, planess, cylindricity, perpendicularity, parallelism, concentric, coaxial.
- Moreover, it can directly compare the work piece with the drawing to check the windage.
| Product parameters | ||||
| Series | JVL | JVP | JVC | JVT |
| Measuring range(mm) | JVL250:250x150x200 JVL300:300x200x200 |
JVP250:250x150x200 JVP300:300x200x200 |
JVC250:250x150x200 JVC300:300x200x200 |
JVT250:250x150x200 JVT300:300x200x200 |
| Size(including base) | 1000×650×1650 (mm) | 800×500×1650 (mm) | 800×500×1650mm | 800×500×1650mm |
| Platform load capacity | 30kg | 30kg | 30kg | 30kg |
| Operating mode | Manual Control | Manual Control | CNC | Manual control |
| Magnification | Optical 0.7×- ×4.5× Image 28×-180× |
Optical 0.7×- ×4.5× Image 28×-180× |
Motor Zoom Optics 0.7×- ×4.5× Image 28×-180× |
Setup Zoom Optics 0.7×- ×4.5× Image 28×-180× |
| Software | OVM lite | OVM | OVM | OVM+TMP |
| Power supply | (110v/220v)±10% (50/60)Hz |
(110v/220v)±10% (50/60)Hz |
(110v/220v)±10%(50/60)Hz | (110v/220v)±10%(50/60)Hz |
| Optical Gauge Resolution | 1μm | 1μm | 1μm | 1μm |
| X/Y accuracy | (3+L/200)μm | (3+L/200)μm | (3+L/200)μm | (3+L/200)μm |
| Repeatability accuracy | 2μm | 2μm | 2μm | 2μm |
| Applicable Environment | Temperature (20~50)℃ Humidity 50% -60% |
Temperature (20~50)℃ Humidity 50% -60% |
Temperature (20~50)℃ Humidity 50% -60% |
Temperature (20~50)℃ Humidity 50%-60% |
| CCD | XinTian (JVC CCD sensor) | XinTian (JVC CCD sensor) | XinTian (JVC CCD sensor) | XinTian (JVC CCD sensor) |
| Remark | It is equipped with high performance host computer +17 inch pure-plane displayer. | Z-axis switch prefixed, easy to operate | 4D automatic adjustable light source | Auto focus measuring height/depth; SPC function, measuring data can be guided into EXCEL/WORD or CAD software. |


