Main features
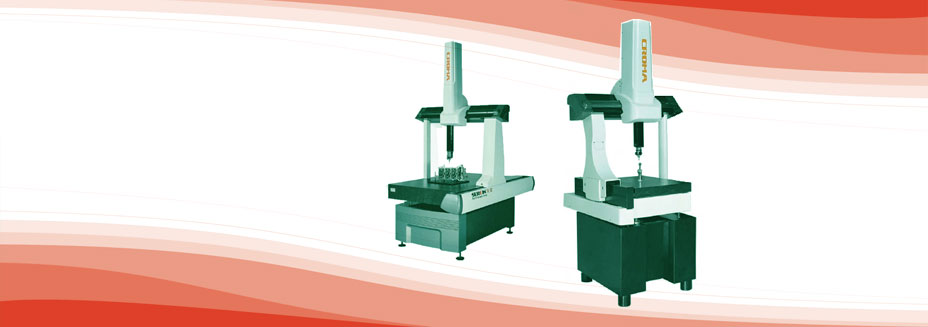
- All aluminium structure combined with hard amodized aerometal for cross beam and Z axis ensures temperature consistency, reduces mass of moving parts and force of inertia, hence ensures high accuracy during high speed movementHigh-precision self-cleaning air bearing in all three axes, smoother movement without wearing down guide ways
- Europe-imported high-precision optical scales for all the three axes, system resolution up to 0.078um; installation method with one end fixed and the other end freely extensible ensures linear expansion and contraction at temperature change and reduces the deformation of the optical scale.
- The patented precision triangular beam, featuring gravity center, better stiffness, and more reliable motion compared to rectangular and cross beams.
- Integral dovetail guideway is Y axis, reduces machine weight as well as twistings during movement, ensures measuring accuracy and stability
- All axes driven by DC servo motors for stable movement and accurate locations
- The IDC-I control system specially designed by HEXA or CROMA improves the dynamic performance and measuring accuracy
- Powerful, easy-to-learn and efficient PC-DMIS BASIC (/PC-DMIS PREMIUM) software
| Machine Types | Croma 584 | Croma 686 | Croma 8106 | Croma8126 | |
| Strokes (mm) | x | 500 | 600 | 800 | 600 |
| y | 600 | 800 | 1000 | 1200 | |
| z | 400 | 600 | 600 | 600 | |
| Measuring Range (mm) | Dx | 634 | 734 | 934 | 934 |
| Dz | 144 | 144 | 144 | 144 | |
| Dz1 | 594 | 794 | 794 | 794 | |
| Working Plate (mm) | Ph | 783 | 783 | 805 | 805 |
| Py | 1155 | 1355 | 1555 | 1755 | |
| Support (mm) | Sy | 824 | 976 | 1178 | 1378 |
| Sy1 | 356 | 379 | 379 | 379 | |
| Overall Size (mm) | Lx | 1050 | 1150 | 1350 | 1350 |
| Ly | 1535 | 1735 | 1935 | 2135 | |
| Lz | 2247 | 2647 | 2729 | 2729 | |
| Max. Part Weight (kg) | 300 | 300 | 500 | 500 | |
| Machine Weight (kg) | 590 | 739 | 1074 | 1196 | |
| MPEe (µm) | 2.8 + L/300 | 2.8 + L/300 | 3.0 + L/300 | 3.0 + L/300 | |
| MPEp (µm) | 3.5 | 3.5 | 3.5 | 4 | |
| Scales Resolution (µm) | 0.078 | ||||
| Max. 3D Speed (mm/s) | 520 | ||||
| Max.3D Acceleration (mm/s) | 1730 | ||||
| Air Pressure | 120 Nl/min, 0.45 Mpa | ||||
| Temperature | 20±2°C | ||||
| Humidity | 45%-75% | ||||


