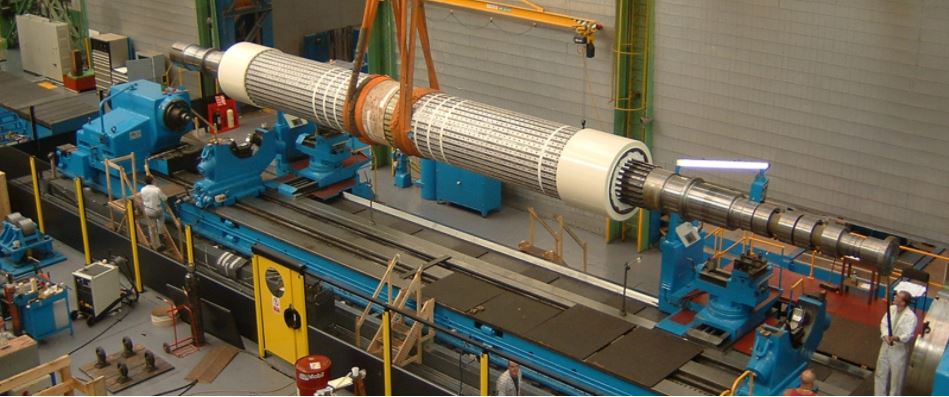
Fully understanding components geometry prior to assembly is critical when faced with the ever growing environmental pressures and increasing fuel prices. The significantly more reliable measurement data collected by iMAP enables rotor stacking software to accurately manipulate component parts, resulting in precisely aligned rotor assemblies. iMAP has been independently verified and proven to offer our customers significant operational improvements over their traditional measurement methods.
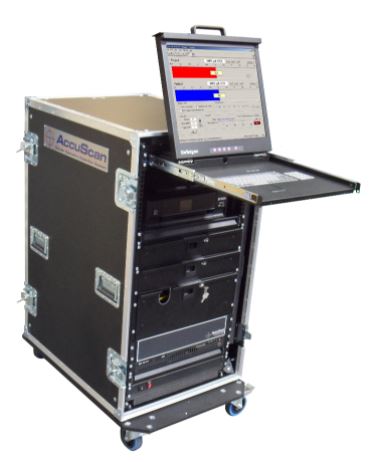
AccuScan’s capabilities deliver new levels of accuracy, flexibility and performance over a wide range of calibration and inspection applications.
IntelliProbe Corrects For Extreme Setup Errors
Software algorithms address profile distortion due to part misalignment, “intelligent probing” corrects for part off-centring errors of up to 2% of the part radius with negligible error.
Distribute Results Easily
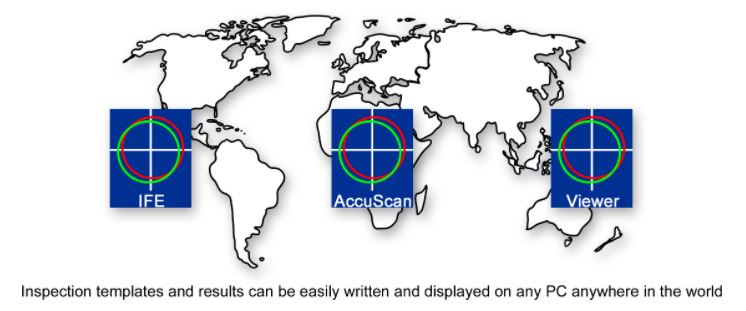
Inspection Templates and Inspection Data Files are easily distributed via email for analysis using the free downloadable viewer or via PDF generated reports and CSV files.
Reduces Inspection Time by up to 90%
AccuScan’s ability to measure 1,000 data points on 2 surfaces simultaneously per revolution will significantly reduce your process times compared with other available methods.
Unlimited Number of Surfaces
2 surfaces can be measured simultaneously with the total number of surfaces that can be measured unlimited.
Shop Floor Compatible
AccuScan has been specifically designed for shop floor use and employs B89.3.1 Standard – Profile Filtering to remove all background interference.
Used To Measure Circular Geometry
A portable Runout Inspection System designed to inspect mechanical runout, electrical runout and other circular geometry of very large gas turbine rotors.
Probe Types
AccuScan™ can be supplied with probes to best suit your application and can include LVDT, Half Bridge, Laser, Wireless Laser, Eddy Current and Capacitance.
Process Reference Standard
The sub-micron circular geometry reduces process measurement uncertainty to a level where AccuScan can be considered your measurement reference standard.
AccuScan Inspection Procedure
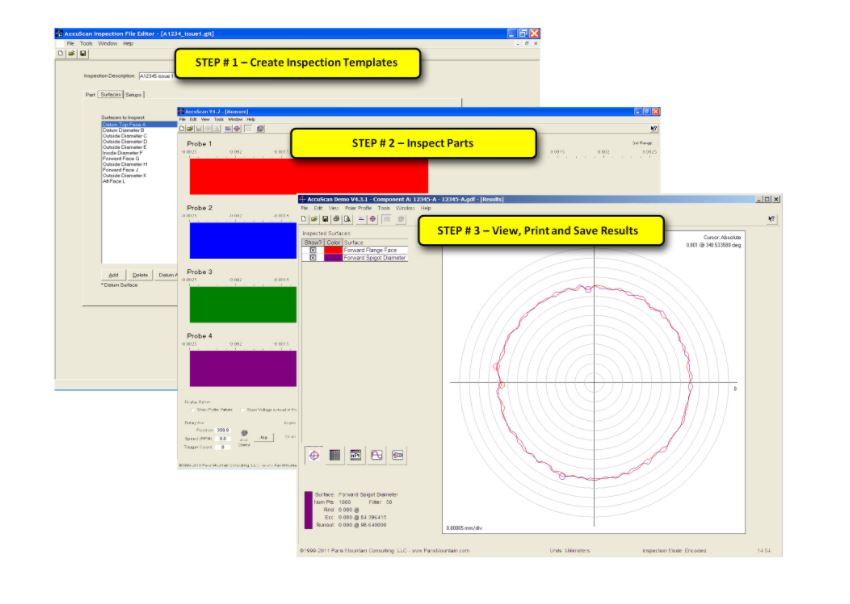
Complete Your Inspection Process In 3 Easy Steps
Step 1 Select an Inspection Template and Assign color-coded probes to surfaces.
Step 2 Start inspection
Step 3 View results, Print Report or Save As PDF file, Save results in Geometry Data File
AccuScan’s features have been designed to help you get the job done.
Fast and Simple
The simple and intuitive full-featured Windows software enables any operator to quickly and easily inspect the type of complicated parts normally associated with gas turbines.
Programming Can Be Done Off-Line, On The Fly, Or Both
Inspection templates can be generated at the machine using AccuScan™, independently on any PC anywhere in the world using AccuScan IFE™ or a combination of both.
Results Are Recalculated Dynamically
Raw inspection data is collected and stored so datum’s, surface definitions and measurement units can be changed at any time with results being recalculated dynamically.
Out-Of-Tolerance Flagging
Out-Of-Tolerance Flagging quickly identifies to the operator non-conforming parts.
Integrated Help
Clicking the Help button located in the top right hand corner of any screen gives the operator instant access to the comprehensive user’s instruction.
Internal Probe Calibration
Probe calibration is accomplished using the Probe Calibration Wizard, which is accessed via the Tools menu. The calibration is a multi-step process, and instructions are displayed at each step.


