C Series Low cost Manual VMM With Powerful Software
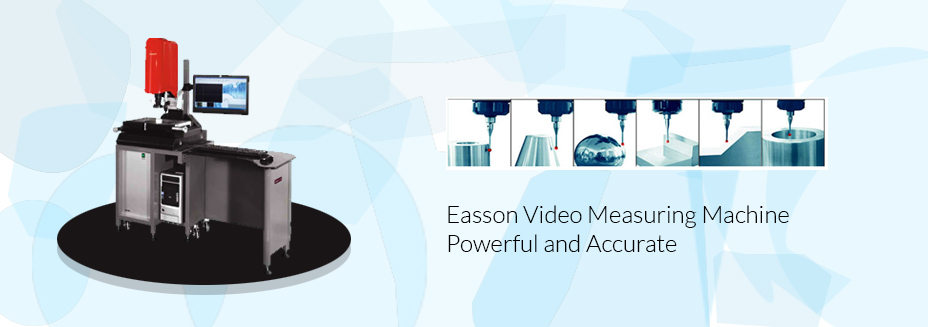
Easson C-Series vision measurement machine has a user-friendly operational interface and a powerful software. The image is with a digital
1/3″ CCD camera and ultra low deformation high precision optional lens. In addition the high precision working table and optical scales can ensure a precision and clear image for measuring and inspection. We have a 10X-250X magnification in the VMM, together with the powerful software, the measuring efficiency will be much higher than a normal profile projector. The chromatic CMOS system ensures a clearing image of different color and different material work piece, so we can get an outstanding outcome in the curve and tiny work piece measuring.
| Model |
C-2515 |
C-3020 |
C-4030 |
| X Y Z Measurement Travel |
250X150X150 mm |
300X200X200 mm |
400X300X250 mm |
| Overall Dimensions |
100X160X140cm |
120X72X160cm |
120X72X160cm |
| Machine Weight |
170 kg |
280 kg |
410 kg |
| Repeatability |
±2 um |
| Max Table Load |
20 kg |
| Operations Models |
Manual |
| Resolution |
0.001 |
| XYZ Measurement Precision |
(4+L/200) um |
| Source System |
Controlled by computer, 4 light source, straight under axis light source |
| Rat Structure |
00 grade granite base and mast |
| Lens |
Ultra-low distortion, can zoom in and zoom out |
| Magnification |
Optical enlarging rate 0.74-4.5x, image enlarging 40-250x |
| Computer Configuration |
1G RAM /160G HDD / 19"LCD |
| Vision System |
1/3" CCD video camera |
Easson EV series has a high capability / price ratio. Auto focus function as standard configures in this series. It uses high precision marbles as the machine base stand. High precision working table and 0.001mm resolution optical scales installed in the X,Y,Z axis increase the measuring accuracy to (3+L/200)um.
The powerful software developed by Easson allows users to output the measuring results to general CAD software such as AUTOCAD, MASTERCAM and etc… or users can directly input the DXF file to the software for comparing. The electronic system of the EV series is advanced, it uses the new multi-axial PCI counter card and light motor controlling card developed by Easson, in this way the controlling system very succinct. For more scientific application, an SPC statistical and analysis software is also
included in the software package. Users can use the software to analysis the measuring result, in order to control the error range and result of the manufacturing. All
measuring results can be output to general office software such as WORD or EXCEL. This allows users to have measurement reports export directly.
All the EV series can install the Renishaw touch probe and 3D software for 3D measurement.
|
Product parameters
|
|
Model
|
EV-2515
|
EV-3020
|
EV-4030
|
|
Measuring range (mm)
|
250x150x150
|
300x200x200
|
400x300x250
|
|
Overal dimension (cm)
|
100x60x140
|
120x72x160
|
120x72x160
|
|
Machine weight
|
170 kg
|
280 kg
|
410 kg
|
|
Repeatability
|
2μm
|
|
Maximum table load
|
25kg
|
|
Operating mode
|
XY by Manual, Z by mouse, keyboard or joystick
|
|
Resolution
|
0.001mm
|
|
X, Y, Z measurement precision
|
(3+L/200)μm
|
|
Light source system
|
software controlled adjustable 4-way surface light and straight
adjustable contour light
|
|
Structure
|
00 grade granite base and mast
|
|
Lens
|
High precision Tele-centric lens
|
|
Precision measuring head
|
English RENISHAW precision touch probe
|
|
Magnification
|
Optical enlarging rate 0.75-4.5x, image enlarging rate 25-145x
|
|
Vision System
|
High resolution CCD lens (1/2″ SONY CCD sensor & special SPC)
|
2. L-series 2D Vision Measurement Machine
Easson L-series vision measurement machine has a user-friendly operation interface and a powerful software. The instrument is with a digital CMOS camera and high precision optical lens, in addition the high precision working table and optical scales, can ensure a precision and clear image for measuring and inspection. The magnification can be 50X-290X, together with the powerful software, the measuring efficiency will be much higher than a normal profile projector. The chromatic CMOS camera ensures a clearing image for different color and different material work piece, so you can get an outstanding outcome even in the curve and tiny work piece measuring.
| Product parameters |
| Model |
L-2515 |
L-3020 |
L-4030 |
| Measuring range (mm) |
250x150x150 |
300x200x200 |
400x300x250 |
| Overal dimension (cm) |
100x60x140 |
120x72x160 |
120x72x160 |
| Machine weight |
170 kg |
280 kg |
410 kg |
| Repeatability |
2μm |
| Maximum table load |
25kg |
| Operating mode |
Manual |
| Resolution |
0.001mm |
| X, Y, Z measurement precision |
(4+L/200)μm |
| Light source system |
software controlled adjustable 4-way surface light and straight
adjustable contour light |
| Structure |
00 grade granite base and mast |
| Lens |
Ultra-low distortion, can zoom in and zoom out |
| Precision measuring head |
English RENISHAW precision touch probe |
| Magnification |
Optical enlarging rate 0.75-4.5x, image enlarging rate 50-290x |
| Vision System |
1.3 M pixel 1/2″ CMOS video camera |
Optiv Classic – Your entry to the world of 3D multi-sensor metrology.
The Optiv Classic Line is the easy way of getting started in optical and 3D multi-sensor metrology. The equipment base of all models is made of granite. Vision sensors and touch trigger probes are available for all models.
The robust cross-table design, mechanical bearings for the axes and the extremely reliable optoelectronic measuring system make these machines particularly suitable for quality assurance in the production area. The units facilitate parts palletisation and feature good accessibility to the measuring table from all sides. If the place of use for your Optiv Classic changes, you can move the measuring machine using a forklift truck and quickly continue measuring in the new location using plug&play.
- Vision-Sensor with high-resolution CCD camera
- Powerful video filter for image optimisation in difficult optical conditions
- CNC motor zoom
- Variable illumination: Incident light, incident light from the side for high contrast illumination of complex surfaces and edges, transmitted light, multiple segment ring light illumination using LEDs
- PC-DMIS Vision measurement software: ease of operation thanks to automatic PC-DMIS Vision routines e.g. for parts alignment or sensor calibration
Features
Optiv Classic 321 GL/321 GL tp:
- Space-saving benchtop unit
- Lightweights of the Optiv Classic line with a machine weight of 170 kg
- 300 x 200 x 150 mm XYZ measuring range with 150 mm Z axis
- Optiv Classic 321 GL tp: fitted with a touch trigger probe in addition to vision sensor, tool racks for stylus modules with up to 6 module positions
Optiv Classic 322/432:
- Economic entry level machines with great price/performance ratio
- Option: TESASTAR touch trigger probe
- Optiv Classic 322: 300 x 200 x 200 mm XYZ measuring range
- Optiv Classic 432: 400 x 300 x 200 mm XYZ measuring range
Optiv Classic 443:
- Option: TESASTAR-p or TESASTAR-mp touch trigger probe
- Low-vibration granite construction with rigid gantry and movable measuring table
- 400 x 400 x 300 mm XYZ measuring range
Optiv Performance – Fast, robust 3D multisensor metrology for production
The Optiv Performance range can tackle many measuring tasks with its robust design in granite, its axes with mechanical bearings and the complete range of sensors. The Optiv Performance line is the first choice for measuring smaller as well as larger workpieces – also in the production area.
A wide range of measuring tasks can be tackled using these machines through a complete range of sensors, without any restrictions.
The design of these granite-based measuring machines ensures high quality with precision mechanical linear guides in all axes. The precision linear guides allow for high accuracy measurements through consistent positioning accuracy.
Harsh environmental conditions in the production environment such as dirt, dust, and floor vibrations are eliminated by the optional machine enclosure, the covered guide-ways and the optional active vibration damping system.
Features
- High throughput
- Series production measurements on large numbers of workpieces
- Optimum access from all sides for automation integration
- Variety of sensors permits exact tailoring to the measuring task
- Variable illumination, also with a multi-segment LED ring light (lateral top light), for high contrast illumination of complex surfaces and edges
- Powerful video filter for image optimisation in difficult optical conditions
- PC-DMIS Vision measurement software: ease of operation thanks to automatic PC-DMIS Vision routines
- Optional air-conditioned machine enclosure
Optiv Performance 222
- Granite-based benchtop unit of proven cross-table design
- Optional subframe and vibration damper
- 250 x 200 mm XY measuring range with 200 mm Z axis
- Vision-Sensor, TTL-Laser (autofocus and scanning), Chromatic White Light Sensor (CWS), touch-trigger probes and stylus module changing racks with up to 6 slots, 3D scanning probe head LSP-X1 and stylus module changing racks with 3 or 6 slots optionally available
- Motorised CNC zoom/fixed optics/Dual Camera optics
- Coaxial LED top light, LED back light, multi-segment LED ring light illumination
- Optional rotary table
- PC-DMIS Vision
Optiv Performance 443
- Integrated subframe with optional vibration dampers
- 400 x 400 x 300 mm XYZ measuring range
- Optional with Dual Z-Design
- Vision-Sensor with high-resolution CCD camera
- Motorised CNC zoom/fixed optics/Dual Camera optics
- Coaxial LED top light, LED back light, multi-segment LED ring light illumination
- TTL-Laser (autofocus and scanning), Chromatic White Light Sensor (CWS), touch trigger probe, stylus module changing racks with up to 6 slots, motorised indexing probe head, 3D scanning probe head LSP-X1 and stylus module changing racks with 3 or 6 slots optionally available
- Optional rotary table or Dual Rotary table
- PC-DMIS Vision
Optiv Performance 664
- Low-vibration granite construction with a fixed bridge and a moving measuring table, precision mechanical linear guides on all axes
- Integrated subframe and optional vibration dampers
- 600 x 600 mm XY measuring range with 400 mm Z axis
- Vision-Sensor, TTL-Laser (autofocus and scanning), Chromatic White Light Sensor (CWS), touch-trigger probes and stylus module changing racks with up to 6 slots as well as motorised indexing probe head, 3D scanning probe head LSP-X1 and stylus module changing racks with 3 or 6 slots optionally available
- Motorised CNC zoom/fixed optics/Dual Camera optics
- Coaxial LED top light, LED back light, multi-segment LED ring light illumination
- Optional rotary table
- PC-DMIS Vision
Optiv Reference – The top of the range in relation to design and measuring accuracy
The premium offering with respect to measuring accuracy and design is the Optiv Reference line. It provides high precision 3D measurements with very tight production tolerances. A stiff granite construction with the most advanced design materials, air bearings on all axes and optional vibration dampers provide an unsurpassed solution for your metrology requirements.
The exclusive Optiv Dual Z-Design is optionally available on all Reference models, as is the complete range of sensors and extensive additional equipment, for example motorised indexable probe heads, touch-trigger and scanning probes, rotary tables or Dual Rotary tables. The Optiv Reference line is the optimum solution for complex, high precision 3D part measurements.
The design goal of the Optiv Reference series was to improve the measuring accuracy. The fundamental design consists of a fine-pored granite base with a fixed bridge and a moving table. The dovetail-designed guideway is an important feature of the high-precision Y measuring table. The machine base rests on an integrated four-column subframe with optional vibration dampers. All axes are equipped with pre-loaded air bearings. Axis are driven through their centre of mass using backlash-free recirculating ball screws and includes DC servomotors with closed control loops and speed control.
The exclusive Optiv Dual Z-Design is optionally available on all Reference models as is the complete range of sensors and accessories, for example motorised indexable probes, scanning and point-to-point probes and various rotary table combinations.
With the Optiv Reference line we use high quality materials to provide the quality necessary to meet the tightest production tolerances.
Exclusive Optiv Dual Z-Design for maximum flexibility during multi-sensor measurements, optional for all models, Optiv Reference 543/763/10103
- Wear-free guide system with air bearings
- Complete 3D-CAD integration in the preparation of measurement routines with PC-DMIS Vision
Optiv Reference 543/763/10103
- Low-vibration granite construction with fixed bridge, moving measuring table and precision air bearings on all axes
- Integrated subframe with optional vibration dampers
- Resolution of the measuring system in the nanometre range
- Measuring accuracies in the sub-µm range
- 530 x 400 mm to 930 x 1000 mm XY measuring range with 300 mm Z axis
- Load-bearing capacity of the measuring table up to 300 kg (on glass plate up to 50 kg)
- Vision-Sensor, TTL-Laser (autofocus and scanning), Chromatic White Light Sensor (CWS), touch-trigger probes and stylus module changing racks with up to 6 slots, motorised indexing probe heads, 3D scanning probe head LSP-X1 and stylus module changing racks with 3 or 6 slots
- Motorised CNC zoom/fixed optics/Dual Camera optics
- Coaxial LED top light, LED back light, multi-segment LED ring light illumination
- Optional rotary table or Dual Rotary table
- PC-DMIS Vision
SPARTAN Series is designed specially for large scale repeated measuring. It is with high speed, high efficiency and powerful function. SPARTAN series especially suits for large-amount in section which requires high speed, high efficiency and high precision. It is a necessary and important equipment within a busy QC line. SPARTAN series uses high precision 00 class granite fixed bridged structure for the bracket, along with high precision work-table, in order to ensure the stability and precision of the machine body as long as the high precision of the measuring. Three axis adopt the Panasonic AC servo motor system, recognized by the whole industry as the most reliable system.
All the moving is controlled by a high speed 32 bit DSP controller in order to ensure a reliable high-speed measurement.The software of SPARTAN series has learning function, users just have to measure the work piece manually for once, the software with record the measuring process, this can be used for the repeated measuring. User do not have to write any program and this largely simplify the measuring process.
|
Model
|
SPARTAN-3020
|
SPARTAN-4030
|
SPARTAN-4030H
|
SPARTAN-6050H
|
|
X,Y,Z Measurement Travel
|
300x200x200 (mm)
|
400x300x250 (mm)
|
400x300x250 (mm)
|
600x500x300 (mm)
|
|
Overall Dimensions
|
120x72x160 (cm)
|
70x90x150 (cm)
|
100x136x185 (cm)
|
|
Machine Weight
|
280 kg
|
410 kg
|
1700 kg
|
|
Repeatability
|
2 micron
|
|
Max Table Load
|
30kg
|
|
Operation Models
|
Automatic, CNC control, by mouse or keyboard
|
|
Resolution
|
0.001 mm
|
|
X,Y,Z Measurement Precision
|
(3+ L/200) micron
|
(3+ L/100) micron
|
(4+ L/150) micron
|
|
Source System
|
Controlled by computer, USB control 4 light source
|
|
Rat Structure
|
00 grade granite base and mast
|
|
Lens
|
High precision Tele-centric lens
|
|
Precision Measuring Head
|
English RENISHAW precision touch probe
|
|
Magnification
|
Optical enlarging rate 0.74-4.5x, image enlarging rate 20-125x
|
|
Flat Structure
|
X/Y/Z stepper motor drive system, 100mm/s
|
Japanese Panasonics motor system, 150mm/s
|
|
Vision System
|
High resolution CCD lens (1/2” SONY CCD sensor & special SPC)
|


